How to Create a Hidden Pivot Point with Torque
How to Create a Hidden Pivot Point with Torque

In some markets, surface mounted hinges and hardware can conflict with the current design trend of free flowing lines and smooth, clean surfaces. In other applications, surface mounted hinges, while reliable and easy to mount, can create issues with cleanability.
TI300 torque inserts from Reell create a smooth feel and infinite positioning internal to the assembly. Design engineers can create a hidden, torque enabled pivot point for a cleaner, eye pleasing design in just three simple steps. With a simple design trick, even the most challenging design configurations can incorporate a hidden torque element.
Step One – Create Installation Port
Referencing the installation port dimensions found in the Sales Drawing at Reell.com for the correct TI300 size, drill a blind hole in one rotating half to accept the knurled shaft. Then drill a blind hole to accept the main body in the other rotating half.
Step Two – Install the Main Body Portion of the Torque Insert
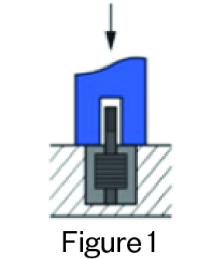
Making sure the main body is aligned with the installation port, press the body into the blind hole by pressing on the main body. Avoid pressing on the shaft itself as shown in Figure 1.
Step Three – Install the Knurled Shaft Portion of the Torque Insert
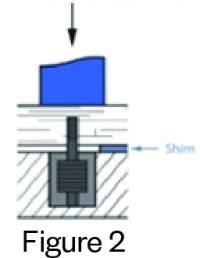
While aligning the second rotating half with the torque insert shaft, press onto the knurled shaft to the correct depth. A shim may be required to maintain the correct press depth as shown in Figure 2.
Design Trick
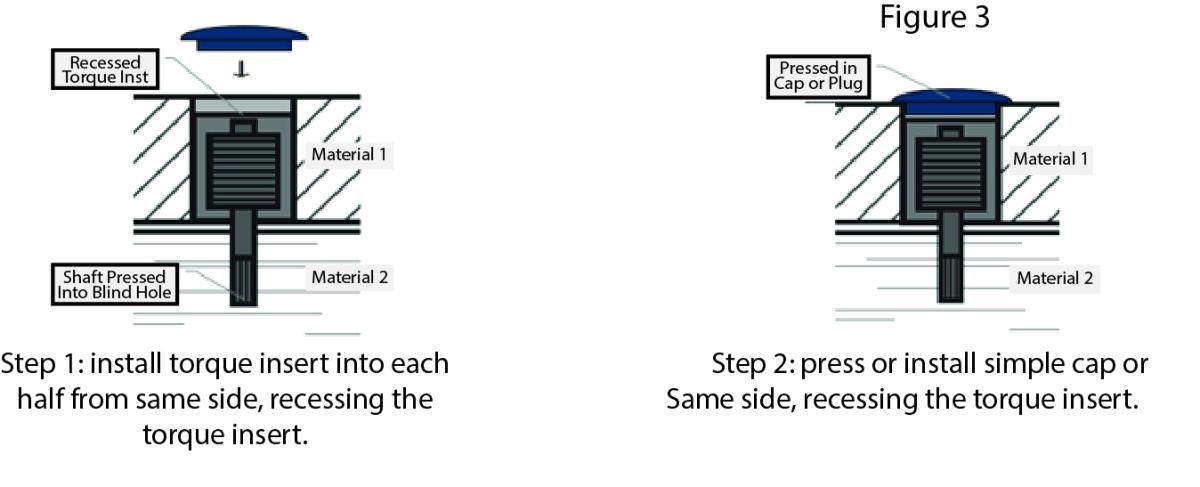
If the overall design doesn’t allow for a blind hole on each side, or the assembly process dictates a press of the two halves at the same time from one side, allow for the torque insert’s main body to be recessed and add a simple cap or flush plug to cover the hole as shown in Figure 3. By securing the two rotating parts and aligning properly, the torque insert can be pressed into each part with a single motion. Be sure the press tool presses on the main body while allow clearance to press the torque insert below the surface.
For more information about the TI300 product line, and complete installation instructions, go to reell.com/TI300